Control Your Laptop
27 Jul 2016I’m here to share a little bit of a project I just finished: Control Your Laptop.
The problem
I love watching movies, TV series, and online classes. Usually, it all happens in my bedroom, where I can watch them laying flat on my cozy bed and during the night. I don’t have cable TV in my room, so I usually connect my Macbook with a HDMI cable and play some videos using Netflix or simply VLC.
The problem is: when I get sleepy, I need to get out of my bed, stop the video, and turn off the TV. By doing that, I wake up and it takes me a while before getting sleepy again. I needed a way to stop the video without getting out of the bed.
My first idea was simply using my cellphone and some app to remotely control my laptop. However, this idea wouldn’t work. My cellphone’s battery is not that good and it has to stay connected to the charger, which is located on the other side of my bedroom, for the most part of the day and the entire night.
Then, a second idea came to my head. I had bought an Arduino a few months earlier and I hadn’t used it yet. Why not hacking some stuff together and solve my problem? The ideal case would be to use my TV’s remote control to play/pause videos on my laptop.
That’s how Control Your Laptop came to this world.
The hardware
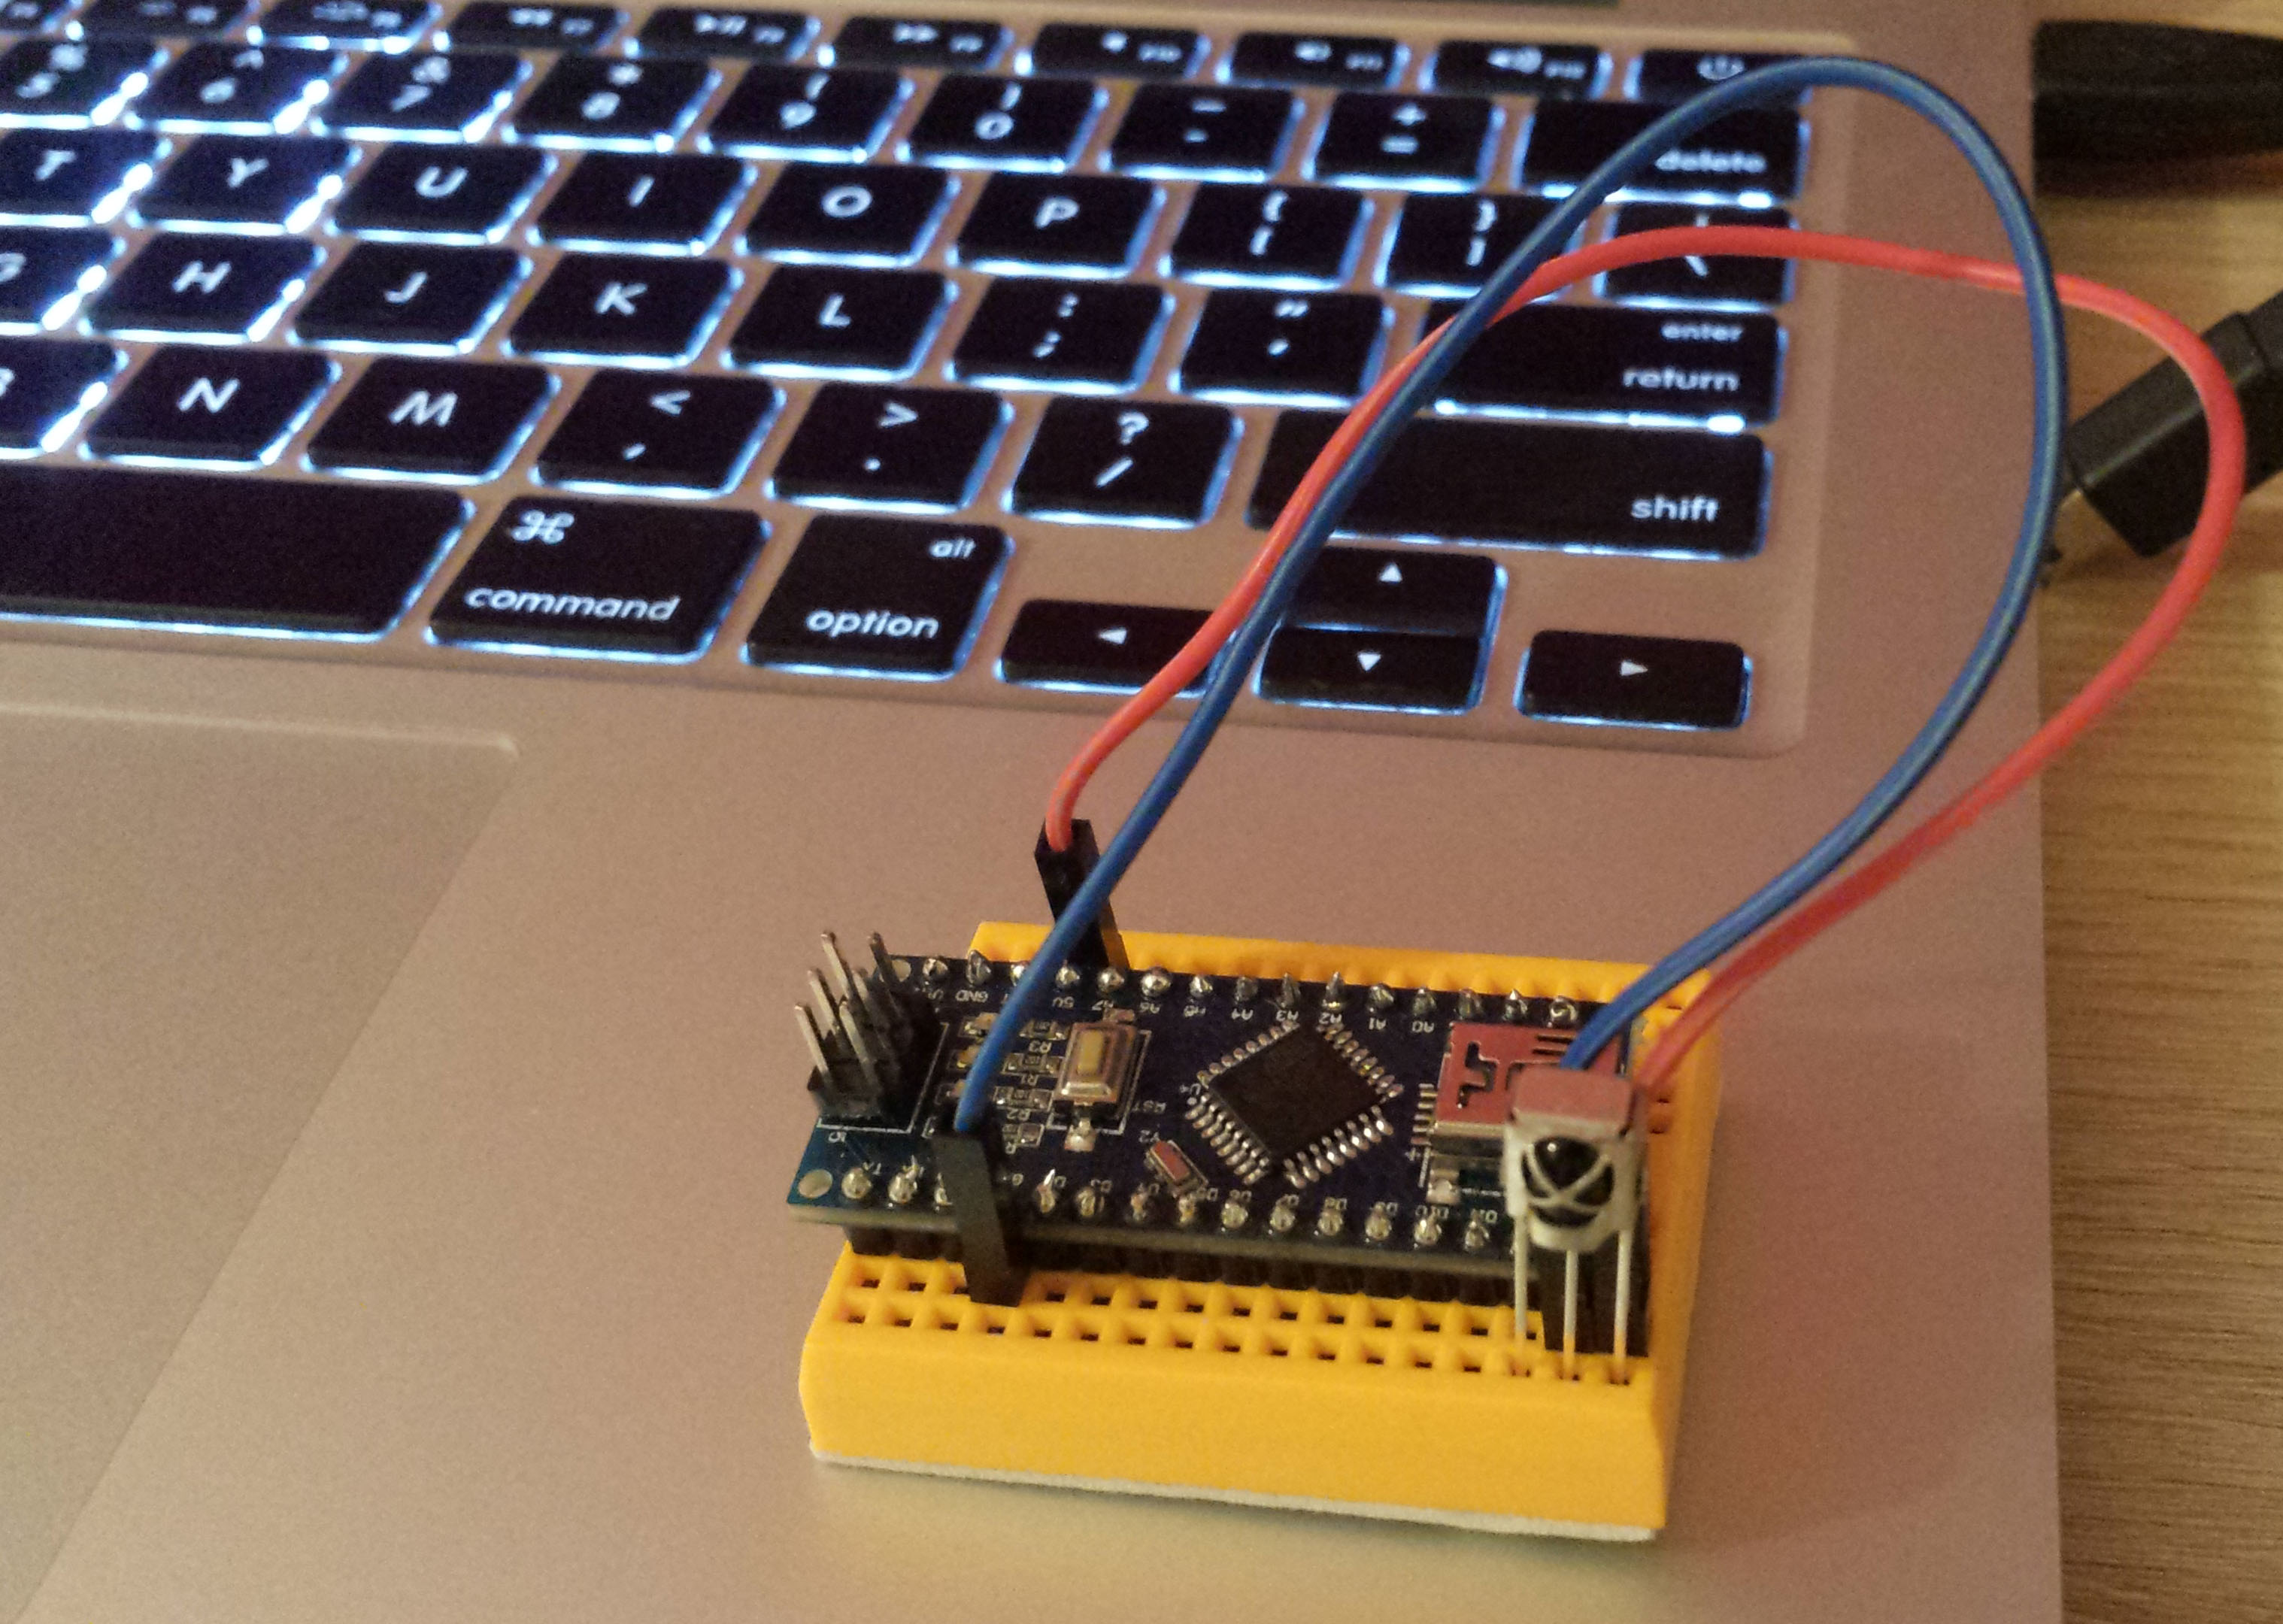
I had to acquire some hardware to receive commands from my infrared remote control. After some research, I found out the TL1838 infrared receivers were ideal for this use case. They are small, operate in the 38 kHz frequency, filter out noise, and can be found on Amazon, eBay, Alibaba, Deal Extreme… I bought some of them online and studied the internals of this sensor with this datasheet, which was really useful.

Next, I would have to build some interface to communicate the sensor with my computer. I realized I could save a lot of time by using an Arduino with USB connection and that’s exactly what I did by using an Arduino Nano, which cost less than USD 7.00 and has the USB jack I needed. This pinout allowed me to know exactly how to connect the sensor to the Arduino’s pins.

The communication
Next step was figuring out how to decode control signals, i.e., I had to reverse engineer my control communication protocol. I started by studying this tutorial on remote control protocols and also built a simple script in Python to plot received signals in real-time. For instance, the following image represents the signal emitted by the control after pressing one button.
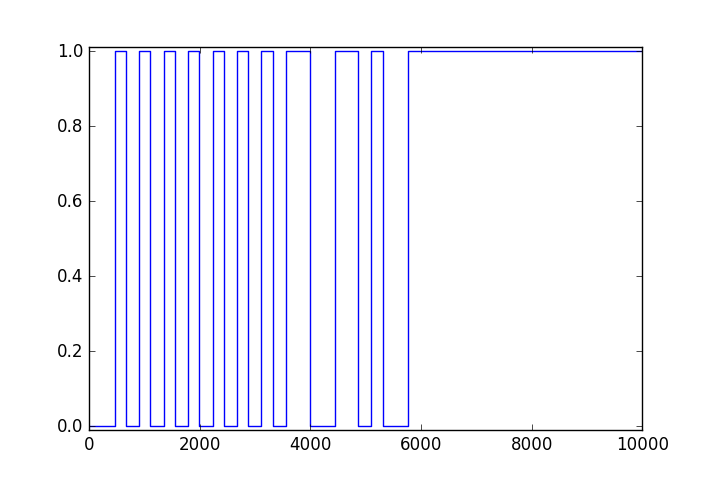
Of course, in order to achieve that, I had to write a firmware to my Arduino that could track with high precision how much time was spent in HIGH or LOW states. So, I dig a bit on ATmega counters and timers with the help of this tutorial and set a timer with 4 microsecond granularity. Hence, the firmware would only capture the duration for every HIGH or LOW and send them via USB to be processed by a script in my computer.
The script
The last part of this puzzle is simply interpreting the signals received by my IR sensor. I wrote a Python script to receive the durations from the USB, decode them as 0’s and 1’s, and play/pause videos. Since both VLC and Netflix accept the space bar to start and stop videos, I only had to figure out how to make my Python script generate a system wide key pressing event.
On Macbook, it turns out that osascript with AppleScript is a pretty convenient way of doing so. I could execute it from my Python script and say something like “generate a space bar key down event to the front-most application”.
The results
By now Control Your Laptop is working pretty fine. I could finally watch something before going to sleep and stop it without leaving my bed. The dog days are over!
Nonetheless, there are several points of improvement in this project, such as:
- Implement more remote control protocols to be decoded
- Automatically identify the protocol being used by the remote control
- Build an actual hardware, with PCB and 3D-printed case
Anyway, that’s already useful and I’ll be much better off by using Control Your Laptop from now on. If you enjoyed this project, you can check the GitHub repository or send a tweet to @matheusvportela. I’ll be more than help to walk you through what has been done.
See you later, guys.